

6.0 Photogrammetry as an alternative to Modeling
This portion of the thesis has taken a long time to modify for online. Partly due to the enormous size of this section and in part due to the final result. This could have been an entire thesis project on it’s own, so let’s answer a few questions to begin:
Introduction: What is photogrammetry and how can it be useful?
What are some of the challenges
What is the process for capturing an object in photogrammetry?
Is this still relevant?
There will be some additional guides along with this to reference, similar to the other sections.
Introduction: What is photogrammetry and how can it be useful?
What is photogrammetry? It is the process of converting photos to 3D models where many photos are taken from different angles around an object, or scene; and then is run through an algorithm to create a 3D recreation of the object, or scene based on how the pixels vary from photo to photo.
At the time of my thesis project in 2016, this technique was relatively new and I was able to join a beta testing group for Autodesk’s Memento program, which was later called Remake, and is now called Recap. Originally, I wanted to compare a 3D model created in Maya with a model created from photogrammetry; but because my organic 3D modeling skills were not great at the time, and with everything I wanted to do in my thesis, I decided to abandon the comparison and continue with photogrammetry as an alternative. Which worked out great because this process took an extremely long time to figure out and get a good enough model to use in post production. Honestly this could have been my entire thesis project if I wanted it to be; and for weeks at a time, this was the only thing I was focused on.
What are some of the challenges?
Above is an example of a relatively decent model I was able to get through this process. This is not the final model used, as there are better results; however, the file size is rather large and is not optimized for online viewing.
Just to reiterate, at the time, the software was a bit finicky and was much better after they launched as Remake, and looks even better now as Recap.
This fire hydrant was one of the first objects I captured through the photogrammetry process. After seeing the results, I was quite impressed, and very excited for this part of my thesis! Unfortunately this was a false positive, as there were many challenges ahead of me.
Non-organic objects tend to be a little easier to stitch together.
What is the process for capturing an object in photogrammetry?
Why did this process take so long? At the time this was still pretty new and a lot of guides on this were not great. Learning the technique of actually taking the photos is pretty easy, but taking the right photos with the right kind of lighting is really the key to a successful stitch. There are a few steps to outline in the entire process:
The set up
Taking the photos
Processing the photos
Adjusting the model
Exporting the Model
It may seem kind of simple, but as I walk through each of these steps, the details will become apparent and the process will start to get more complicated.
The Set Up
This is perhaps the most important and most difficult step in the whole process; and if done incorrectly, will mess up the entire 3D model.
Light. A LOT of light is needed for the subject, the best kind of light to use is extremely diffuse light.
This accomplishes three things:
obviously shedding light on the subject
destroying any unnecessary shadows, and to
compensate for the high f-stop number.
A high f-stop (small aperture) is needed to make everything infinitely sharp.
You want everything to be in focus, not a pretty picture.
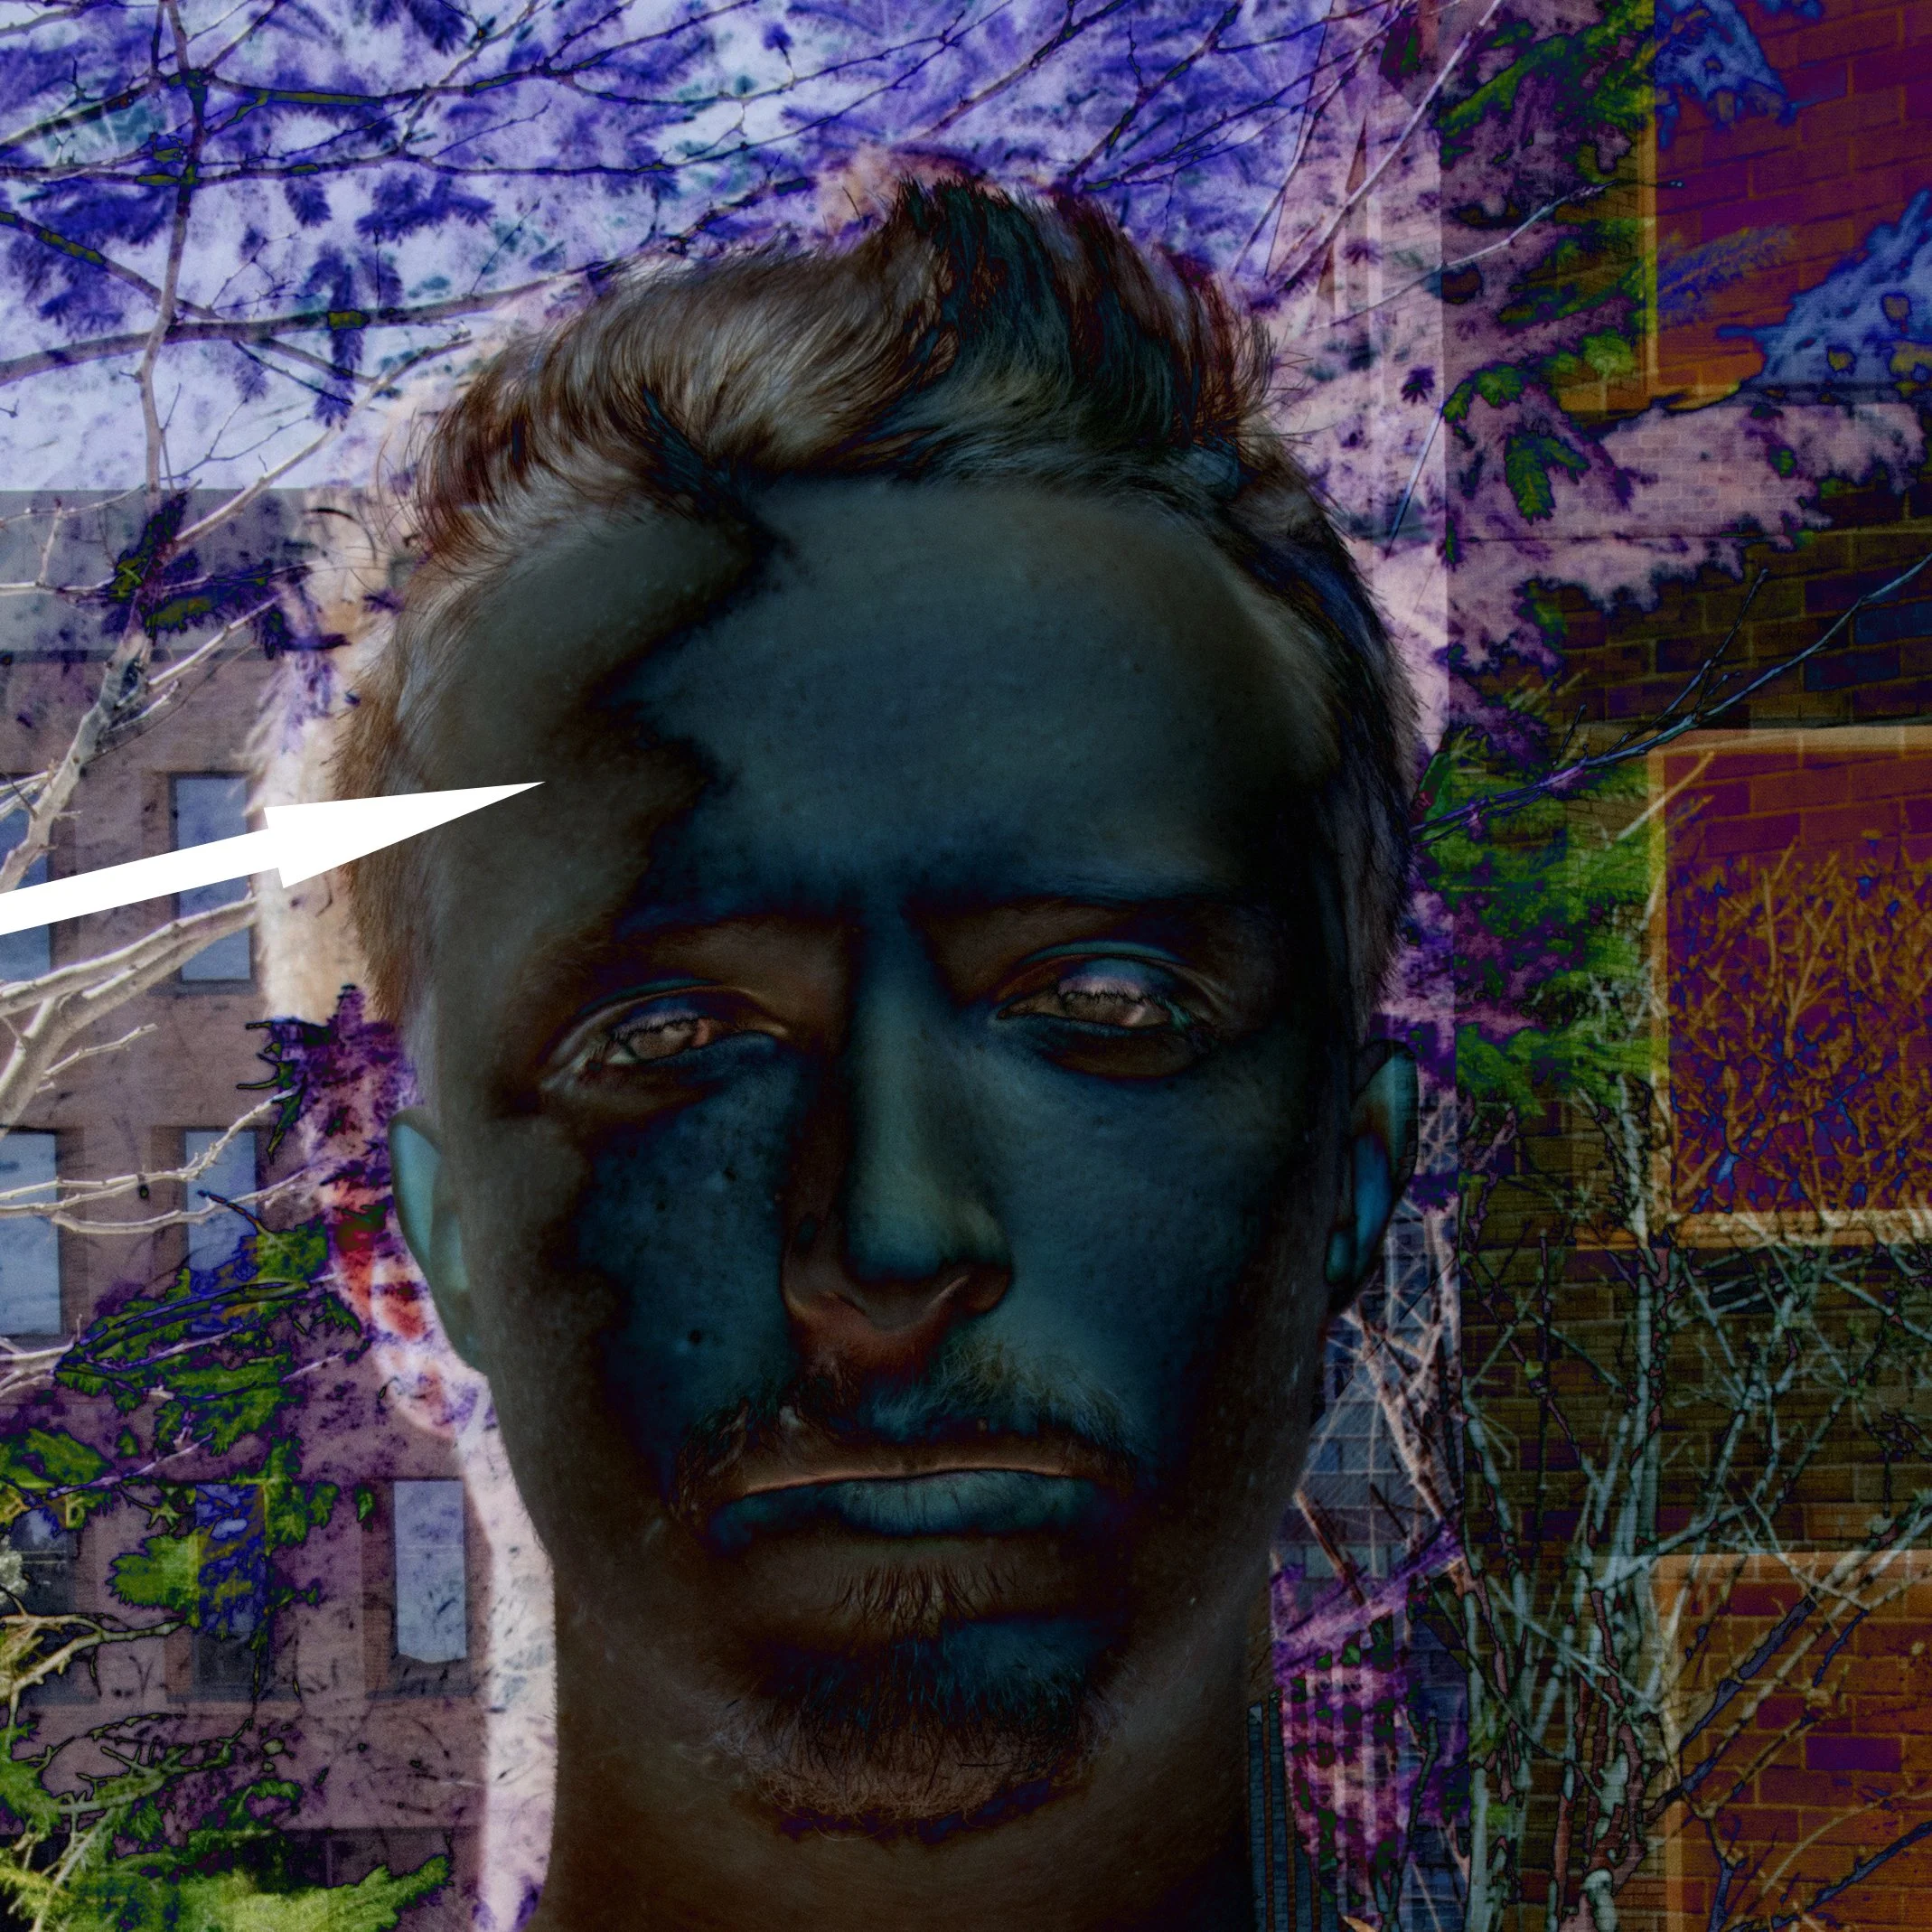
Depending on the complexity of the object, shadows will be cast around edges. As long as the object is lit very well, there will still be shadows, or rather high contrast edges, on the object. Instead of trying to explain, let me show:


The photo on the left will create a hard edge on the forehead because the program will think this is an edge rather than a shadow on part of face. The lighting conditions on the right are much better; even though the values on the left are different than the pixel values on the right, this shows a smooth transition of the overall values from left to right which shows a roundness to the forehead rather than a hard edge in the middle. Diffuse lighting is always better!
Look at this difference image between the two images from above and notice how harsh that shadow is. It creates a thick zigzag line rather than showing a shadow.
Diffuse light is very important to the process
Taking the Photos
At the time, Memento (the beta software) was limited to 250 photos. This made the photo process a little challenging, but I erred on the side of caution and took way more photos than needed and tried several different paths in each session. Below is a sample set from one of my better sessions. As you will discover later in this post, the objects laying around do have a purpose.


Ugly photos are better than pretty photos for the photogrammetry process.
Processing the photos
It was surprising to discover how much of a difference one photo could make in the submission of photos. For example, using 'set A' (photos 1 - 200) and 'set B' (photos 200 - 1) would yield different results. This could be frustrating, as any combination would give varying outcomes. At one point, there were almost 20 different sets in the queue.
Adjusting the model
Receiving the model back and getting to play with it can be fun, but the first thing that must be done is cleaning up the model. After the photos were transformed into a 3D model, there would be a certain amount of errors involved. Some of these errors were easy to fix, while others were more challenging. The most common clean up process was to decimate the model (reducing the topology) and turn triangles into quads for a cleaner edge flow. The software creates many triangular faces, and before export it should decimated and converted to quads. Usually a low poly version will be exported as well to speed up the workflow in other software such as Nuke.
Exporting the model
After the model has been cleaned up and is ready to export, there are a few things to remember. A high-poly and a low-poly count model may want to be exported. One can be used as a proxy model and the other can be used for the final model. From Memento a turntable or video fly through can be exported as well. Photos and screenshots are also a great way to document the model. The absolute most difficult thing is the naming convention. When experimenting to get back the best model, the best thing to do is just version everything. My files should have looked like:
LukeModelTop_01.obj
LukeModelTop_highPoly_08.obj
LukeModelFace_04.jpg
LukeModelTop_turntable_01.mov
Is this still relevant? Insight from the future looking back.
As of 2023, technology has advanced significantly. New techniques such as NERFs yield impressive results, and smartphones now have Lidar, which can produce great outcomes, especially considering the time it takes. Organic models will always be tricky, and one of the tasks that will persist regardless of the process is the cleanup.
It is essential to differentiate between getting a model (statue) and getting an asset (pipeline-ready), as they are two completely distinct objectives. This was one of the biggest takeaway from my thesis project.