

2.1 How to shoot a Chrome Ball
HOW TO SHOOT A CHROME BALL
This post will guide you through the steps for shooting a Chrome Ball
If you have not read my post on what a chrome ball is, or want to know more of the science behind it, you can read that here.
This guide is based on my experience with shooting a chrome ball and my research, which I will provide links to at the bottom.
Software:
For my thesis, I used Photomatix Pro 5, and PTGui, but because I had access to Nuke I did a lot of my transforms there because it was free on campus. I converted them using the lat/long map node and exported an image.
A Few Quick Notes:
The ball will only captures about 270 degrees of the scene
90-degree separation between separate photos should cover the gap
Radiance has the same value at any point along a ray
Distance is no longer a factor in the measurement of light
How to shoot a Chrome Ball for Visual Effects
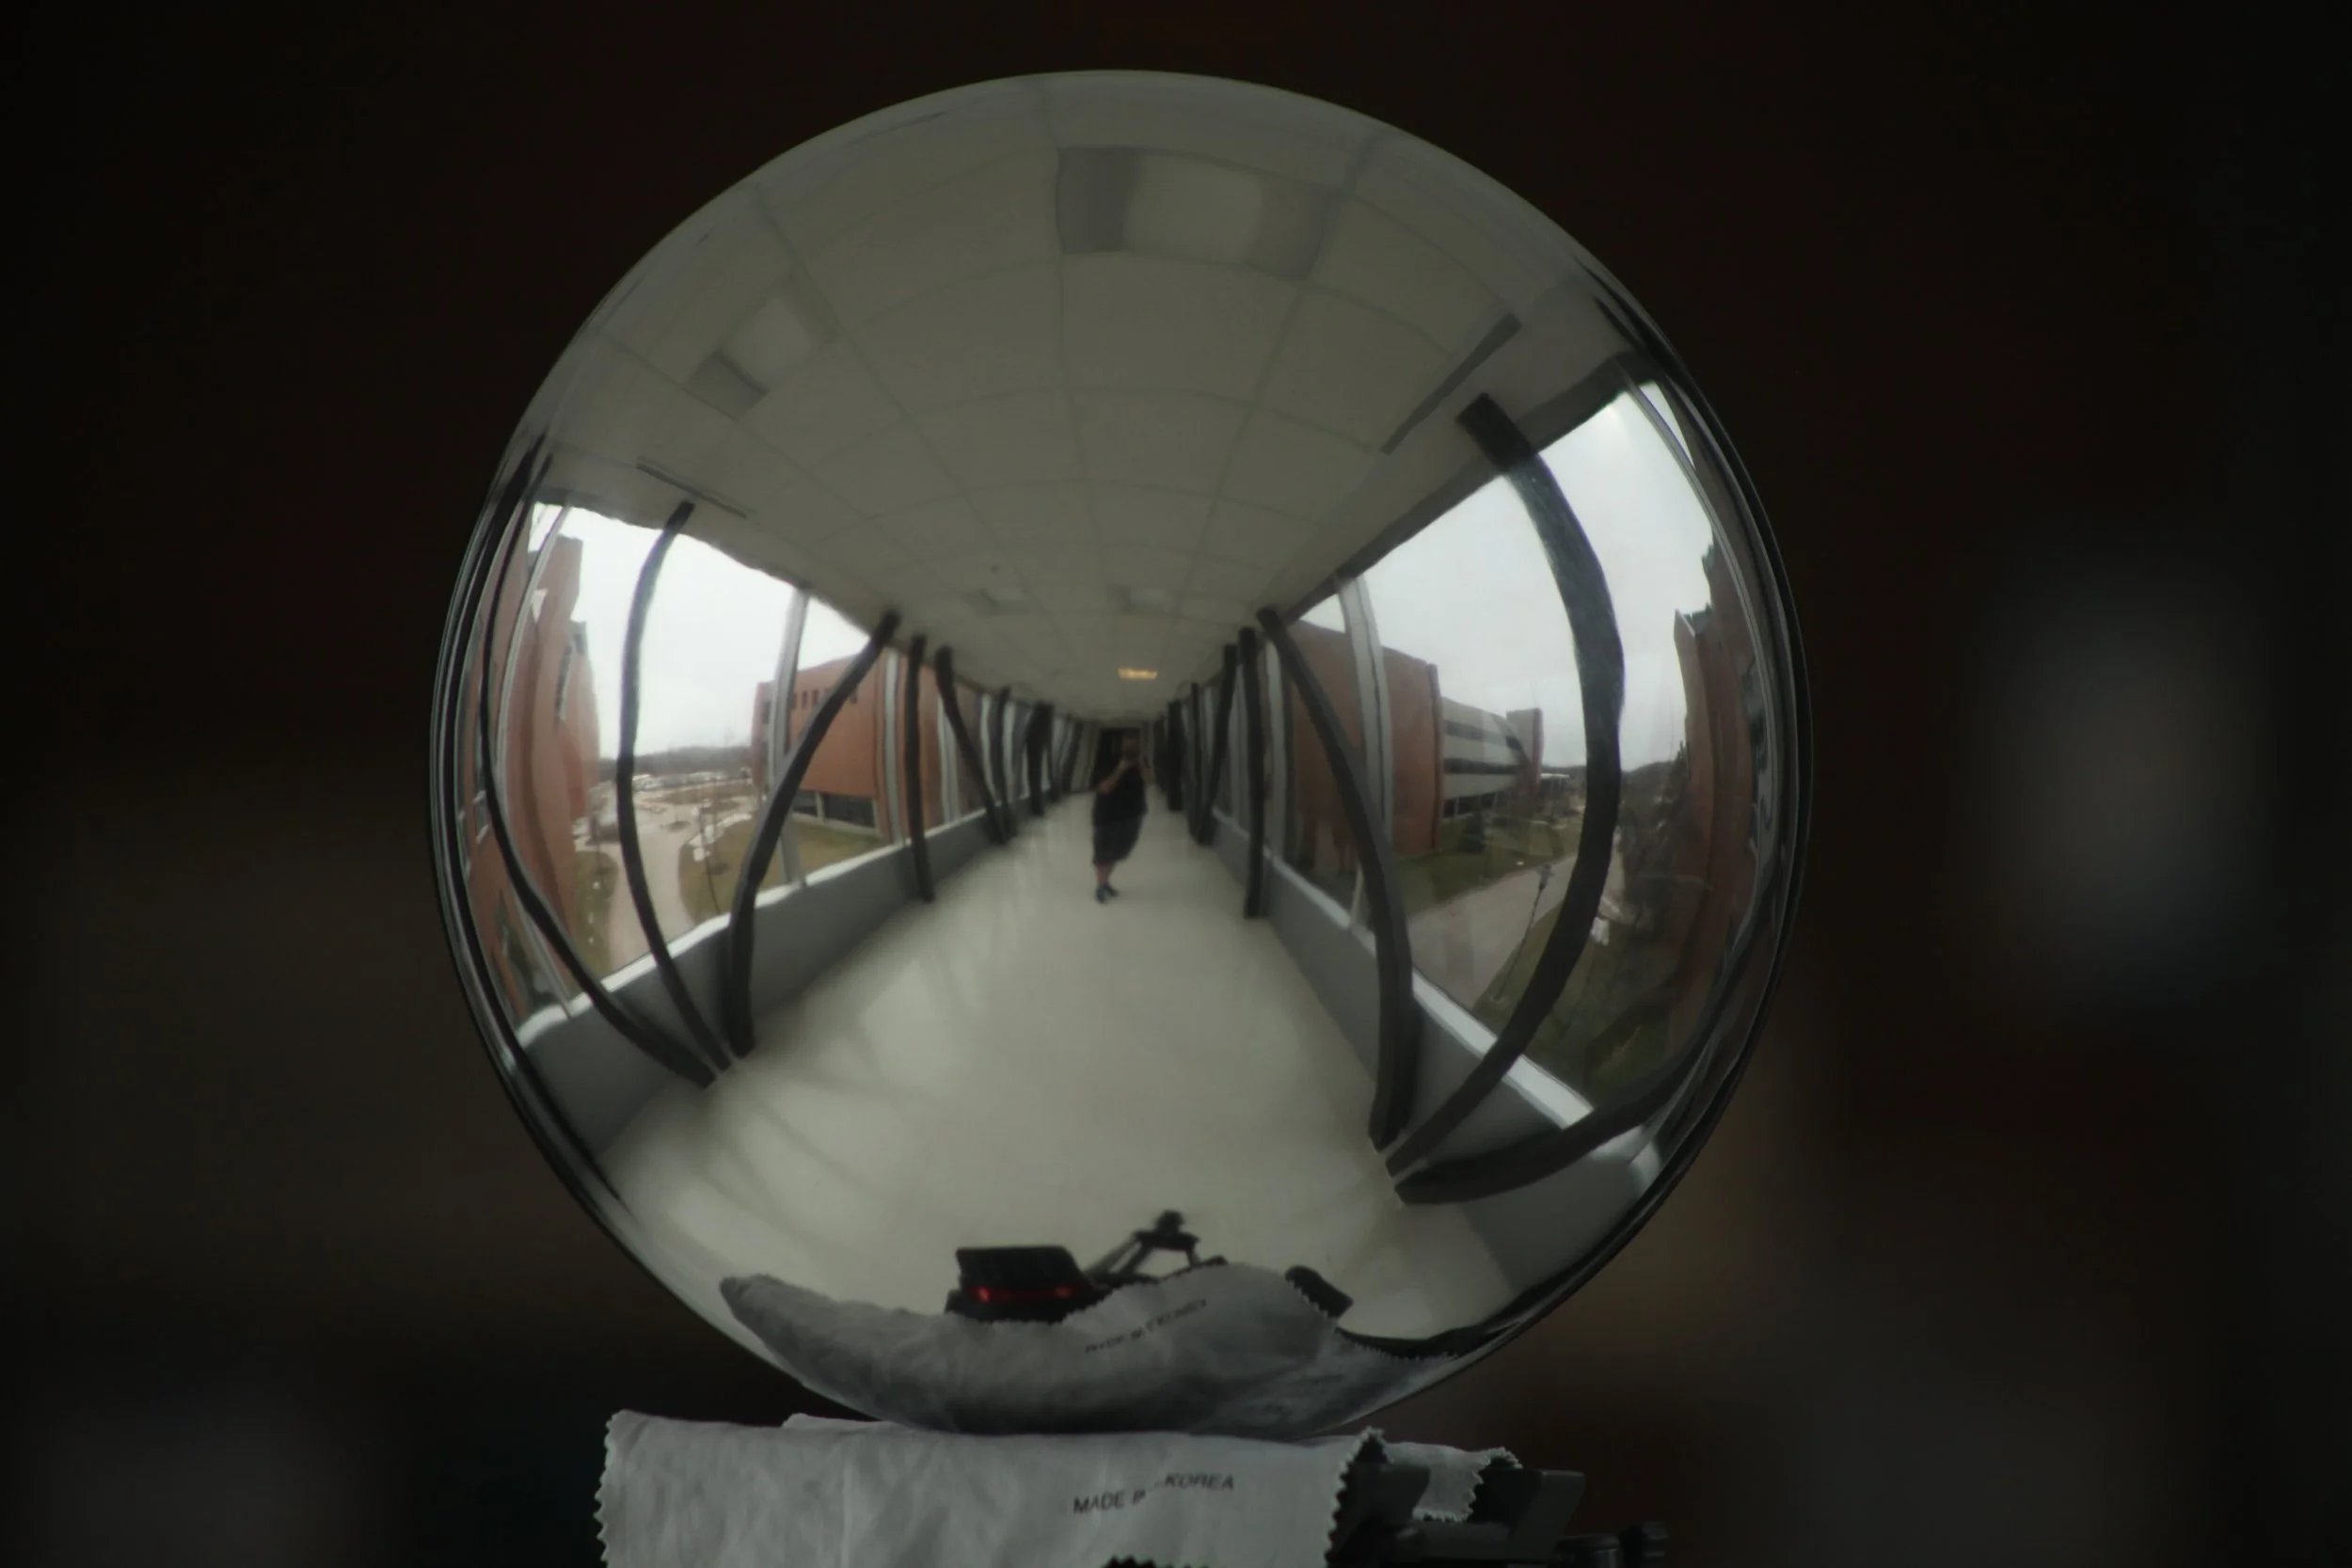
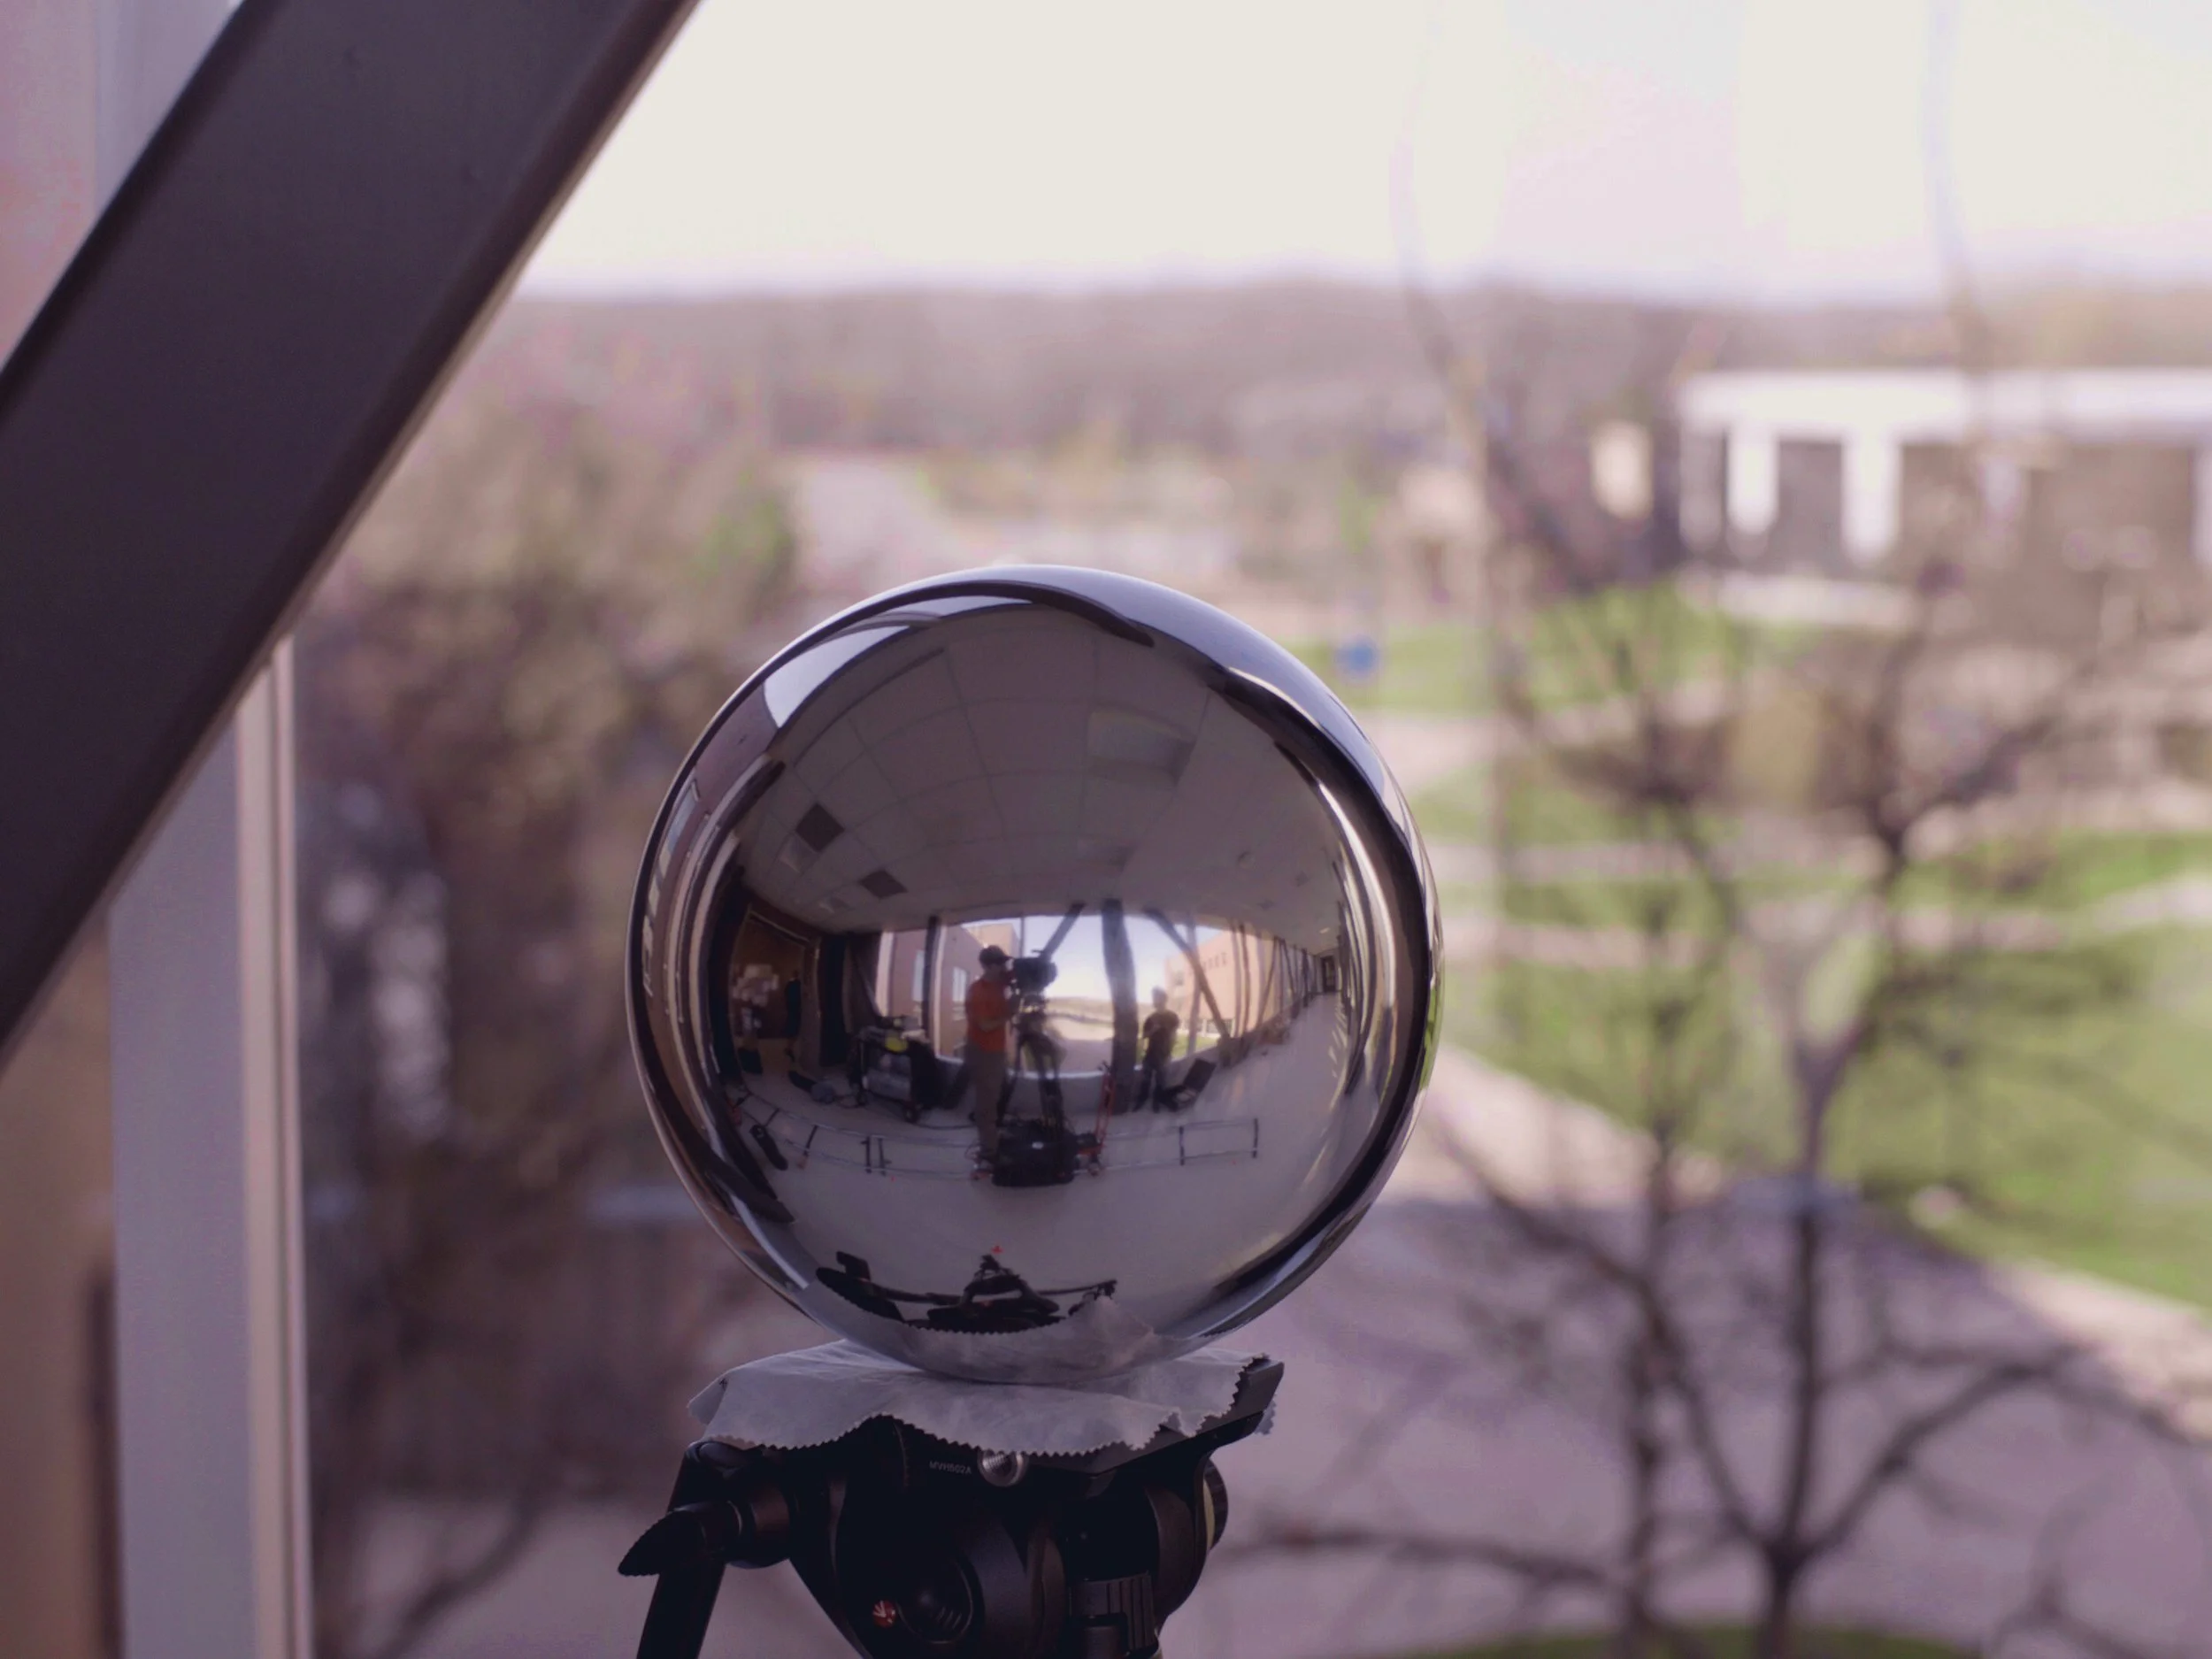
Place The Ball Where You Want To Capture The Lighting Information
Grab A Camera With A Long Or Zoom Lens
Set The Camera To Normal Exposure And Zoom In As Close As Possible
Take A Photo
Move 90 Degrees From That Location And Take Another Photo
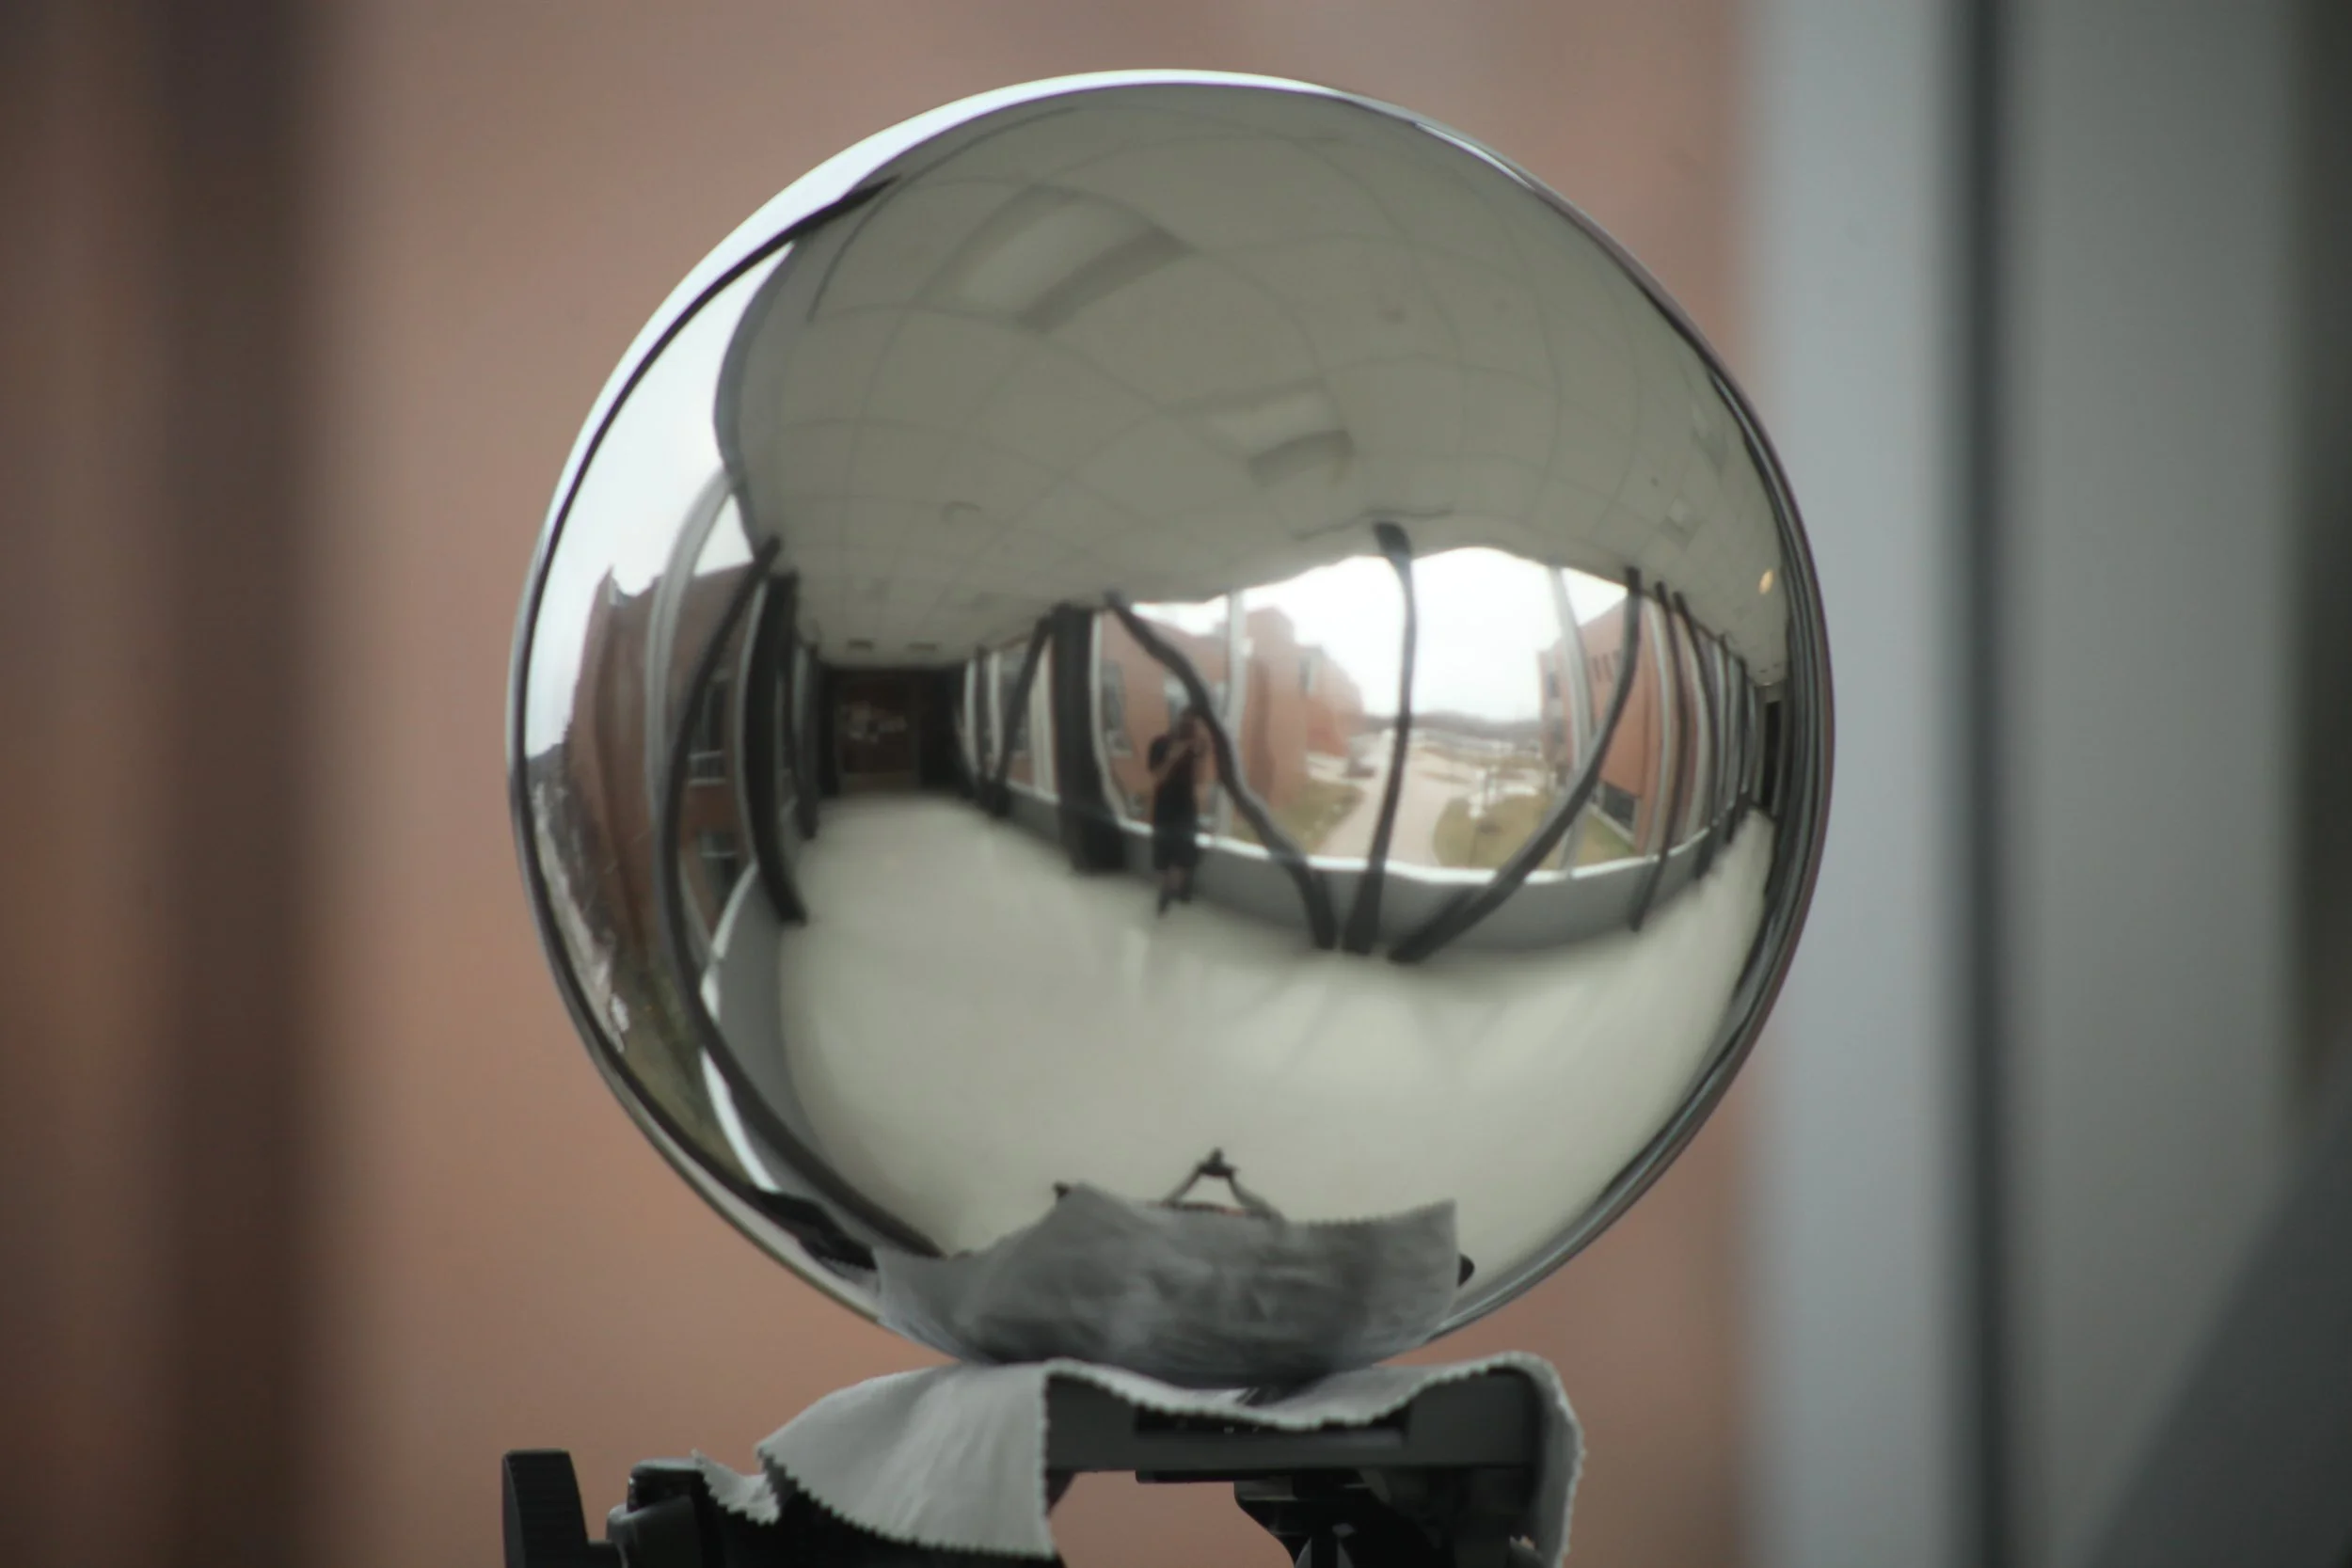

This demonstrates a 90-degree separation on the chrome ball
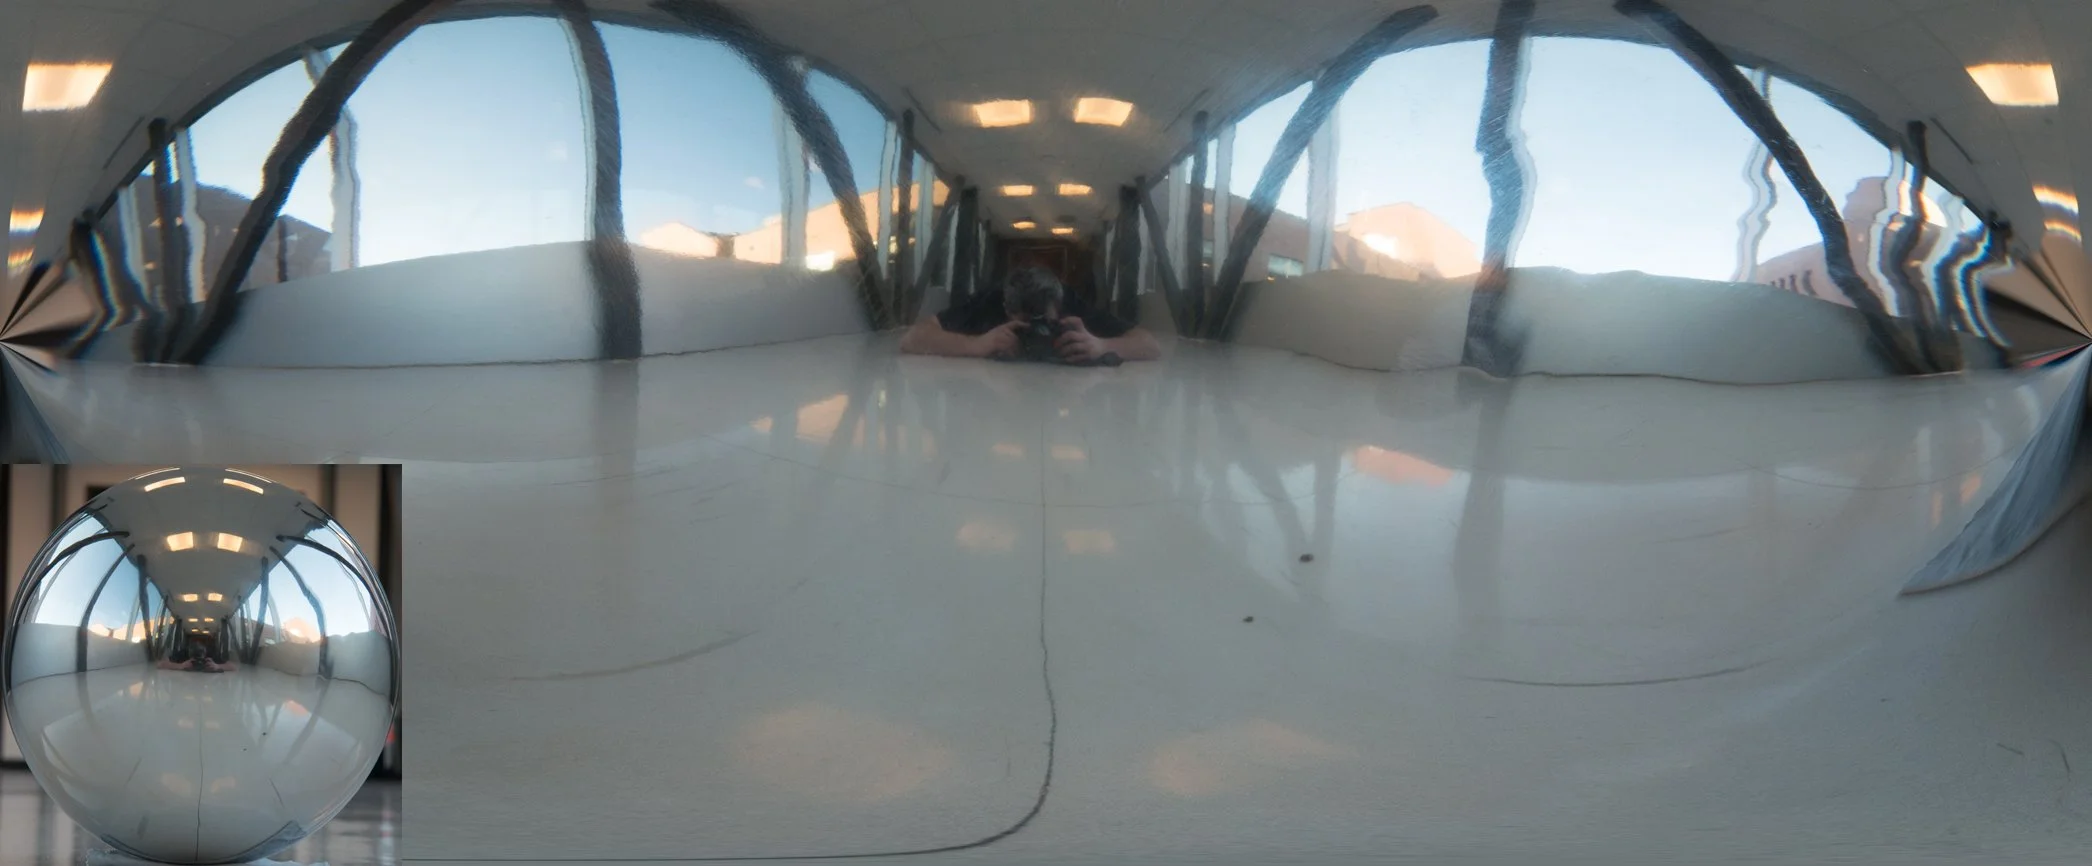
There are many different ways to go about the next part of the process. This is the generic pipeline for what to do with your photos now that you have them.
What To Do After Shooting The Chrome Ball
Crop The Photo To A Square That Just Encloses The Ball ⚠️
THIS IS SUPER IMPORTANT⚠️
Unwrap The Image With Your Software Of Choice
Import The Photo Into Your 3D Or Compositing Software Of Choice
Apply It As A Reflection Map, Or Radiance Map
If this becomes popular, or many people comment saying they want to see specific tutorials with each software, then I may add them at a later time. For now, if you have Photoshop you can achieve a decent result:


Photoshop Quick Method:
After cropping to a square
Go to Image/Canvas Size/
Copy the smaller dimension and past it on the larger one
It will not work unless perfectly square*
Filter/Distort/Pinch/
100% Value
This stretches some of the information on the edges and produces a better result for the unwrap
Filter/Distort/Polar Coordinates/
For some photos, you may need to rotate the image first before applying the filter
Polar to Rectangular
From here the image is unwrapped, just not in the optimal way.
You can experiment with Photoshop to improve it or use other software for better results, like the images below.

For more precise lighting information to capture as much as possible
follow the same process as above but incorporate the steps from the post about shooting HDRI photos
If you don't want to purchase a chrome ball or can't afford one, don't worry - there's an alternative solution that might be perfect for your needs! Discover the world of Panospheres and find out how they can revolutionize your visual effects process in our next post.
🔗 Unlock the Potential of Panospheres.: An Exciting Alternative to Chrome Balls
Still on the fence about whether to use a chrome ball or a panosphere for your project? I've got you covered! In the in-depth comparison, learn the pros and cons of each method and make an informed decision that best suits your needs.
🔗 Chrome Ball VS Panosphere: Which One Is Right for Your Project? Find Out Now!
Notes:
Okay, yes it will work if not perfectly square, but it will distort the data
Reference 2 (can no longer be found 😕 )