

4.5 Visual Effects: Green Screen

When digital first started to make a scene in the industry there was a serious concern for visual effects. In film, the random noise helps to cover up some of the flaws commonly seen in and around the visual effects.
The structured pixels of a digital system does not offer this advantage, which can make the visual effects stand out a lot more! However, digital systems do tend to have better resolving power, which is good for high resolution CG elements. Other camera features present in digital systems that can play a role in VFX are: sharpness, resolving power, depth of field, noise, and blurring operations.
The process of compositing the green screen scene will make these differences in the digital vs. the film systems obvious. The VFX scenes will be tested in The Foundry’s NukeX 9.0. The differences between the systems will be assessed based on the opinion of the compositor (that’s me), and the quality of the final image results.

We shot three different green screen tests: Normal green screen (as required per the project guidelines), green screen vs blue screen (because we shot film, I wanted to really push the limits and try both screens), and complicated objects. The other VFX scenes are in the next two posts.
Trying to stick to the whole superhero theme, our actress was composited into the 2012 Avengers movie.
Scene 1A: Normal Green Screen
ACES was used on this project to preserve as much color information as possible, and because we made that choice, it was obvious to proceed with making each camera truly match the scene we were compositing into.
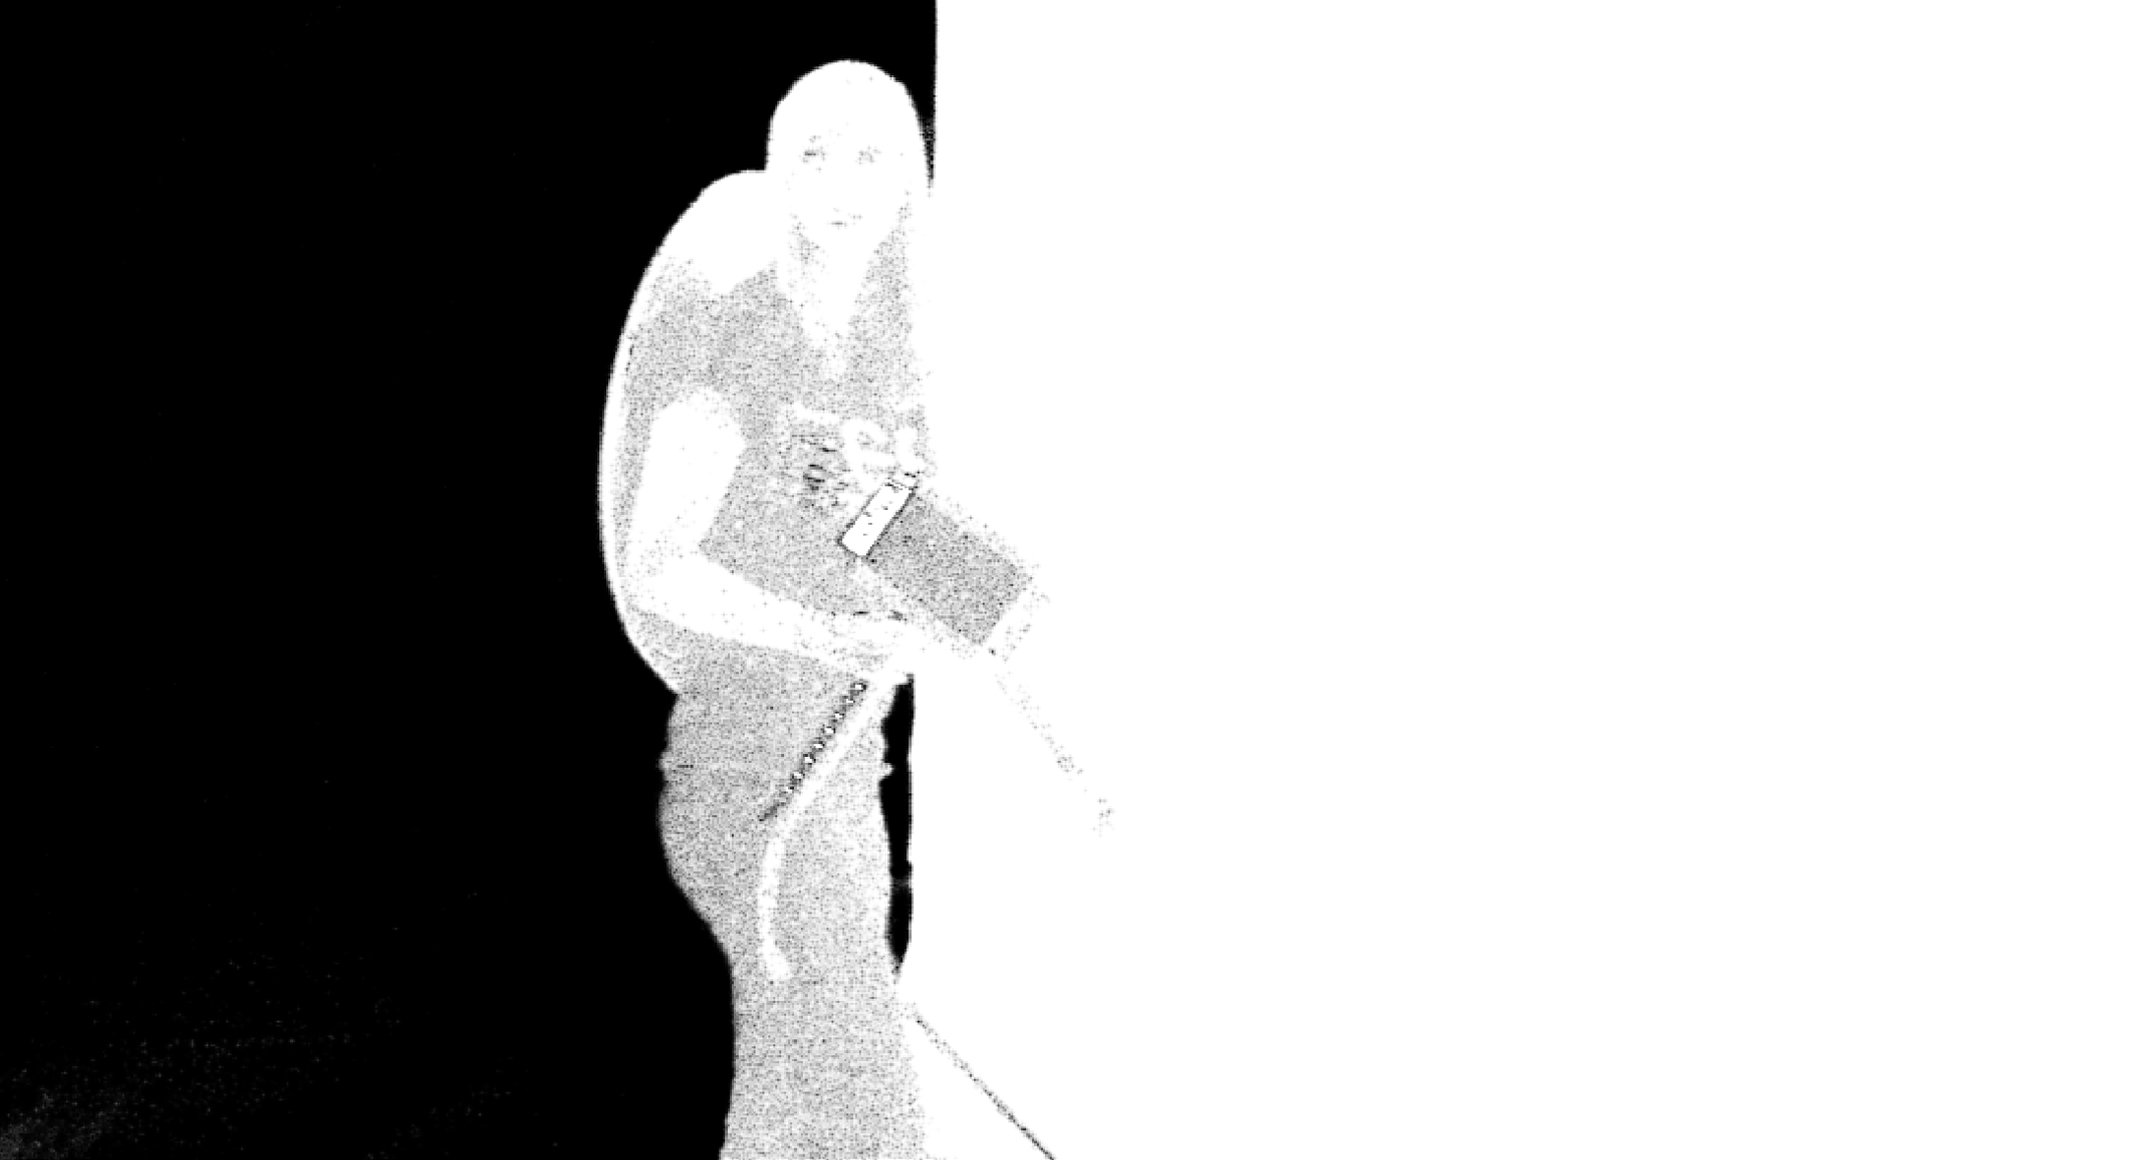
We studied several scenes from the movie, but ended up selecting the one seen throughout the images. We chose this scene mainly because there was a pristine opportunity for our actress to walk from the blue screen onto the green screen so we can compare, in one shot, the difference between the two.
As we predicted, film should give a noisier shot, with the blue screen being the most difficult to pull a clean key from. This is because the blue channel is the noisiest channel of the three color channels.
Overall the key was much easier to pull on the D21 than the film.


Keep in mind that these screenshots are zoomed in so you can see the detail of the composited shot. These first two shots actually work quite well in the final scene because they are far enough back in the scene, it can be difficult to see any edge detail or noise that will make the composite stand out.
With that being said, in the film shot at the beginning of the scene you can see a lot of the blue screen because it did not key out that well. In fact, it was very difficult to get a good key even trying to make it fit into the scene. For the blue screen in the film shot, it would have to be painted out by hand which could take a long time. Too much noise present in the blue channel of the film makes it difficult to pull a good key. Overexposing the film could have corrected this artifact; however this could not be done on set due to a limited amount of available lights on set.


The D21 is tremendously better to pull a key from, however it is still not perfect. Looking at the first shot, our actress is a little bit transparent, especially in the shield. This can easily be fixed with a garbage matte inside of the actress with a few adjustments to the keyer. It was left with the basic settings to show how well just the basic key could do. The blue screen in the D21 footage acted just like the green did, which was not as a problem as the film footage was. Both the film and the D21 show really good edge reproduction throughout the shots as seen in the next few images.


Looking at Shot 3 and 4 you can see how the noise in the film really shows up in the composite, whereas in the D21 the noise cannot be seen. However the edges in the D21 are a little rough, not on the edges of the actress but it looks as if there is an aura around her, from the composite. Again this is an easier cleanup to do because the D21 green screen footage was not adjusted much from the default settings. In the film footage there is no problem with the edge, but this could be attributed to the more adjustments on the film’s keyer.


Scene 1B: Green Screen vs. Blue Screen
Green? Or Blue? What is the best option? The short answer is green, but there are some instances where blue will be better! Obviously, if the subject is green, a blue screen would be the better choice and vise versa. The defining attribute that will make the largest impact on the decision is noise.
For a lot of people, they will not pay too much attention to noise, it is just a part of the medium of film, or a result of shooting with a limited amount of light. It can be difficult to see in the original photos, but after pulling a key, and showing the alpha channel, the noise is very much present in the shot.
Magenta is the opposite of green, so it is common practice for compositors to place a solid magenta layer beneath the footage to highlight any flaws within the keyed shot. Sometimes this shows up as a patch outside of the subject that is a slightly-off shade of green than the one chosen for the keyer; and other times it can be on the subject depending on the colors in the scene. This is something heavily explored in the Color Chart Post.
D21
Green VS Blue


Fig. 22-4. Film Sc. 1B-1


Fig. 22-1. D21 Sc. 1B-2
A few things to notice:
The contrast of the green screen wall is not fully uniform due to warping.
Not cause for concern though.
Alpha vs Clean Alpha
The green screen is much better at cleaning up the alpha, than is the blue screen.
A lot more magenta noise shows through in the blue screen composite.
Now see what happens with the film for both cases:
Film
Green VS Blue


Fig. 22-2. D21 Sc. 1B-3
Green
Take a look at the alpha from each camera, and notice how the film alpha channel shows a little bit of noise; this will make the footage more difficult to composite into the scene. The clean alpha from the D21 gave a quick composite with great results. The white overcast in the film alpha on the green screen gave some concern, but was easily cleaned up both inside and around our actress.


Fig. 22-3. Film Sc. 1B-4
Blue
This is where a lot more problems start to become a bigger issue. The default alpha key on the film footage shows a tremendous amount of noise that will require a lot more time to composite into the scene. It can be done! Even in the clean alpha, there is a lot of noise present in the scene, and will require garbage masks on the inside and outside of our actress.
Again, notice how much the noise is impacting the composites and how much worse the blue screen is than the green screen.
The technique used for the green key could not be used on the blue key, because when it was applied there were some serious edge issues with the alpha. The D21 blue key, though it was still noisy, the part outside of our actress was unaffected.


This really shows how noise present in the source footage can add more time to the whole visual effects process. With less noise, better, quicker results can be achieved.
If you’re looking for a camera to do green screen work (or blue screen), choosing a camera that has a low noise profile will be crucial in pulling a quick and easy key in post. This may or may not save money depending on how much is spent on camera and how much will be spent in post production.
Noise is typically not good for visual effects, however it can help to hide some of the digital alterations done to the image. It also helps defeat some compression and preserves some color information in the end shot. To learn more about noise, check out this post.
Yes, digital is better for compositing, but it still has its limitations as seen in the next section.
Scene 1C: Complicated Objects
Some very difficult-to-composite items were placed in the scene to really push the limits of each cameras ability to pull a key.
D21


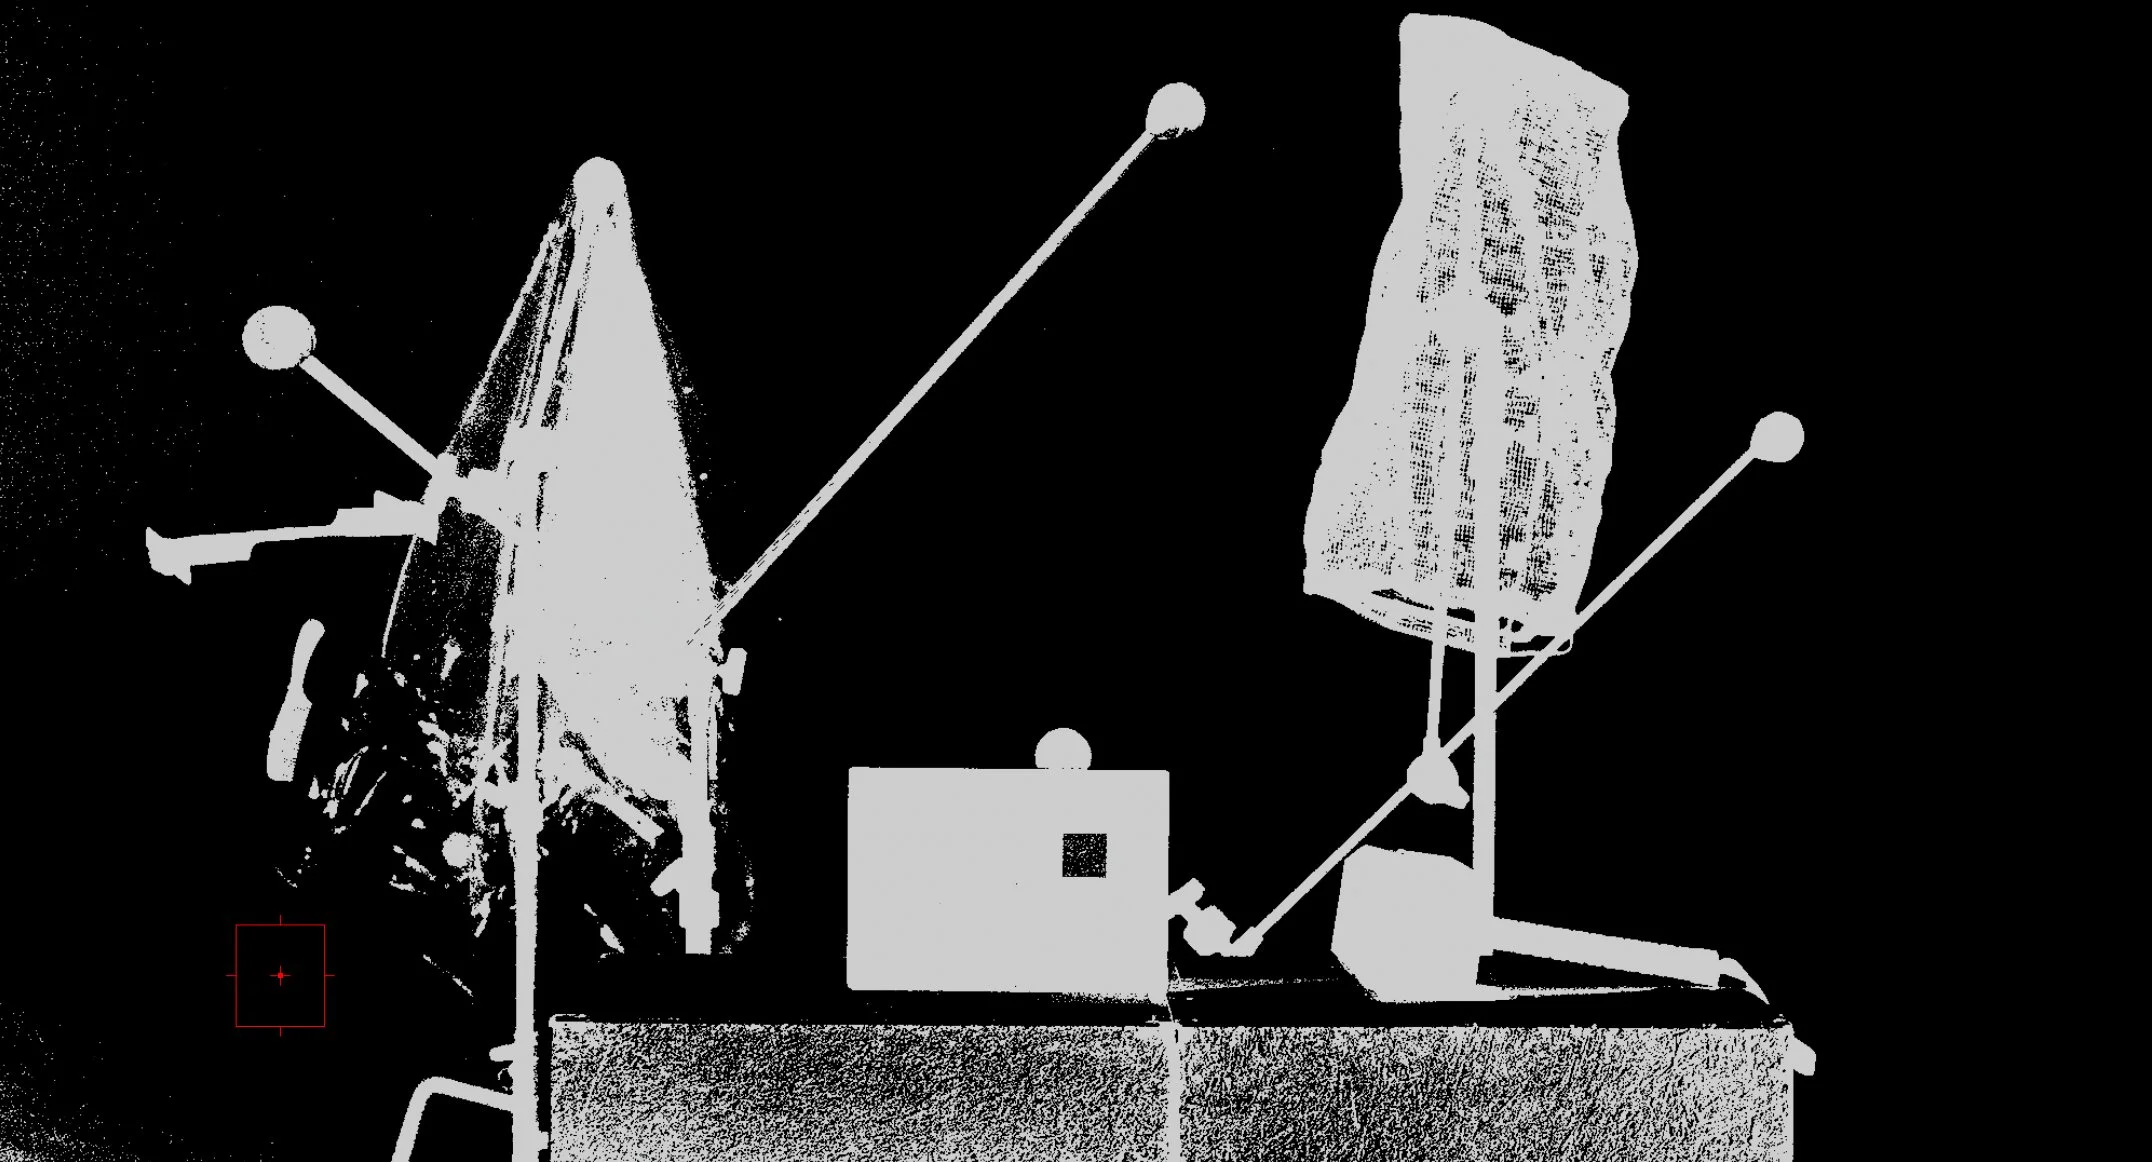

Fig. 23-1. D21 Sc. 2A
Film


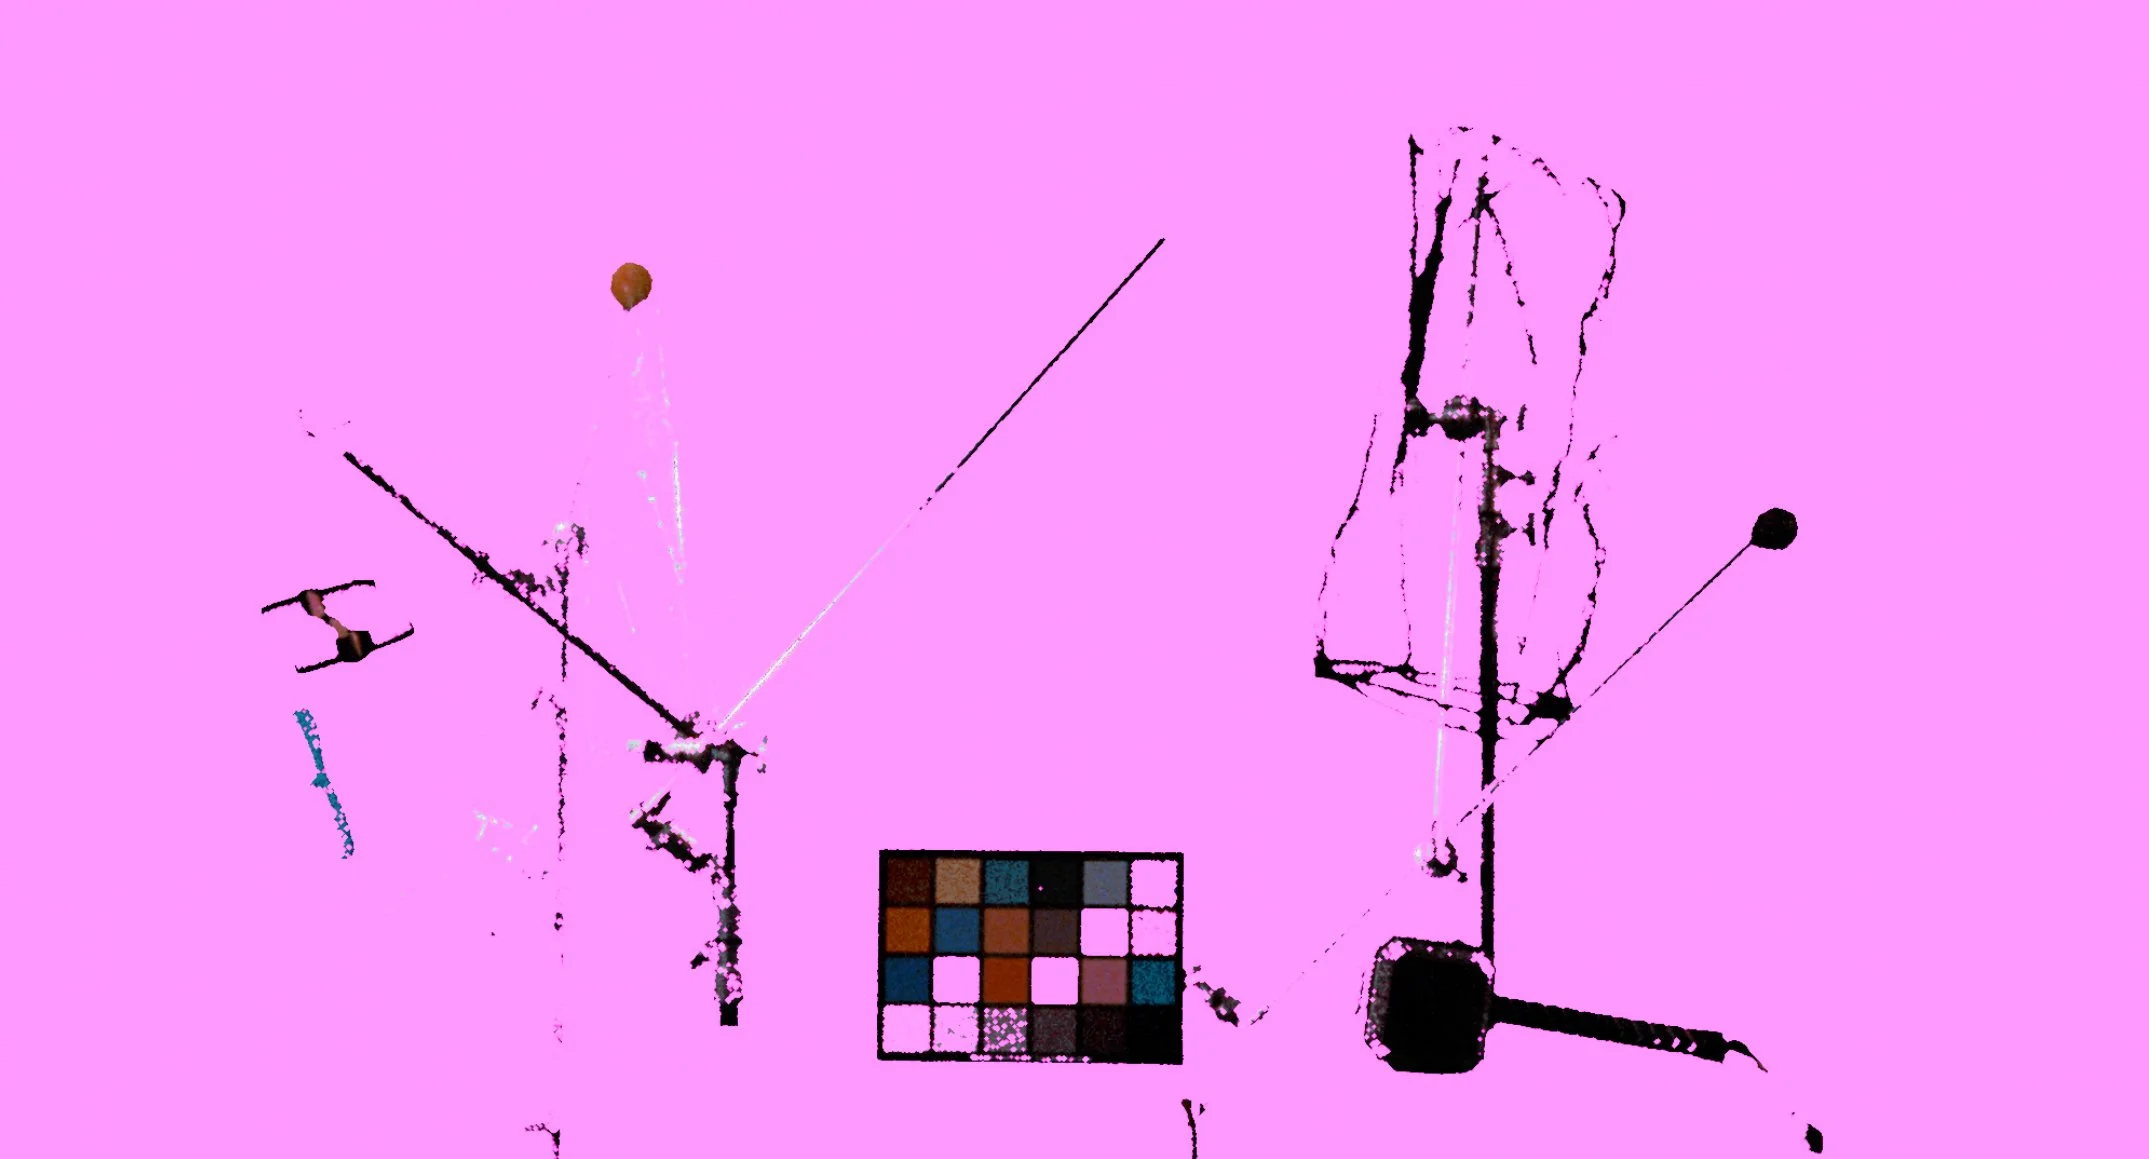
Fig. 23-2. Film Sc. 2A
The purpose of this scene is to place objects that might be difficult to composite, and compare how each camera does. This pulls together a lot of attributes of camera systems in a practical way. Sometimes there will be see through objects, or nets on a green screen and the compositor needs to put them in a scene and make it look like they were on location rather than shot on a green screen. System sharpness, MTF, and color reproduction all play a factor in each composite.
High frequency content like the comb-mobile is a good way to compare MTF and resolving power on each camera.


Taking a look at the alpha channel the D21 has better resolving power and can distinguish the space between the teeth of the comb, which will make the compositing job much easier; but looking at the resolving power of the film camera, well there is none. All of the teeth blend together which will make the compositing job much more difficult to pull a good clean key.
Shower Curtain


Above, the Film only manages to bring the highlights through to the end; but the D21 manages to bring most of the shower curtain through to the end in the pictures below. The see-through part of the shower curtain does make it a bit noisy for the final composite, especially in the lower left region of the curtain.


Likewise with the net, it is a little bit noisy, but it works somewhat, because the holes in the net come across as noisy. But not all of the net comes through, this could work for a particular shot. The film however, only brought the dark shadow parts of the net through.
D21


Film


The hammer, and color chart are large enough for garbage masks to be applied, whereas the net, combs, and shower curtain cannot use a garbage mask. This is what makes those items so difficult to green screen, because they are either see-through or they contain a lot of high frequency content which can make for a difficult time compositing.
Notes:
Read this post for more information about the history of the green screen
In hindsight, it would have been a good idea to film the combs, curtain, and net at a closer position, to test if the key would have been more successful.
Magenta is the opposite of green and works great to composite check, likewise yellow is the opposite of blue and works great to check on blue screens. This was done inside of Nuke, but not shown in any of the photos